
Move Managed Disks to another Subscription
I saw this question pop-up on one of the distribution lists that I am part of and I thought I would tackle it in this article on how to move a managed disk to another resource group or subscription.
Previously the way of moving a managed disk to another subscription was through a complex set of steps that you performed in the Azure CLI or PowerShell. As of September 24, 2018 this process is no longer required. You can simply move the managed disk to another subscription or resource group through the portal.
Just follow the steps to enable the move
Register Resource Provider in the Subscription
To be able to move managed disks to another subscription (or resource group) we will first need to register a resource provider:
Register-AzureRmProviderFeature -FeatureName ManagedResourcesMove -ProviderNamespace Microsoft.Compute
The status of the registration needs to be “Registered” before continuing. To check the status use the following command:
Get-AzureRmProviderFeature -FeatureName ManagedResourcesMove -ProviderNamespace Microsoft.Compute
Once the provider is “Registered” you need to register the Microsoft.Computer even if it was previously registered.
Register-AzureRmResourceProvider -ProviderNamespace Microsoft.Compute
Test Move
In this example, I’m going to move a virtual machine with two managed disks and an availability set.
- Go to the Azure Portal
- Navigate to the resource group where the target virtual machine is.
- In the menu select Move, Move to another subscription

- Select the managed disk. In this example, I’m going to move the virtual machine with the managed disk, availability set and networking resources.
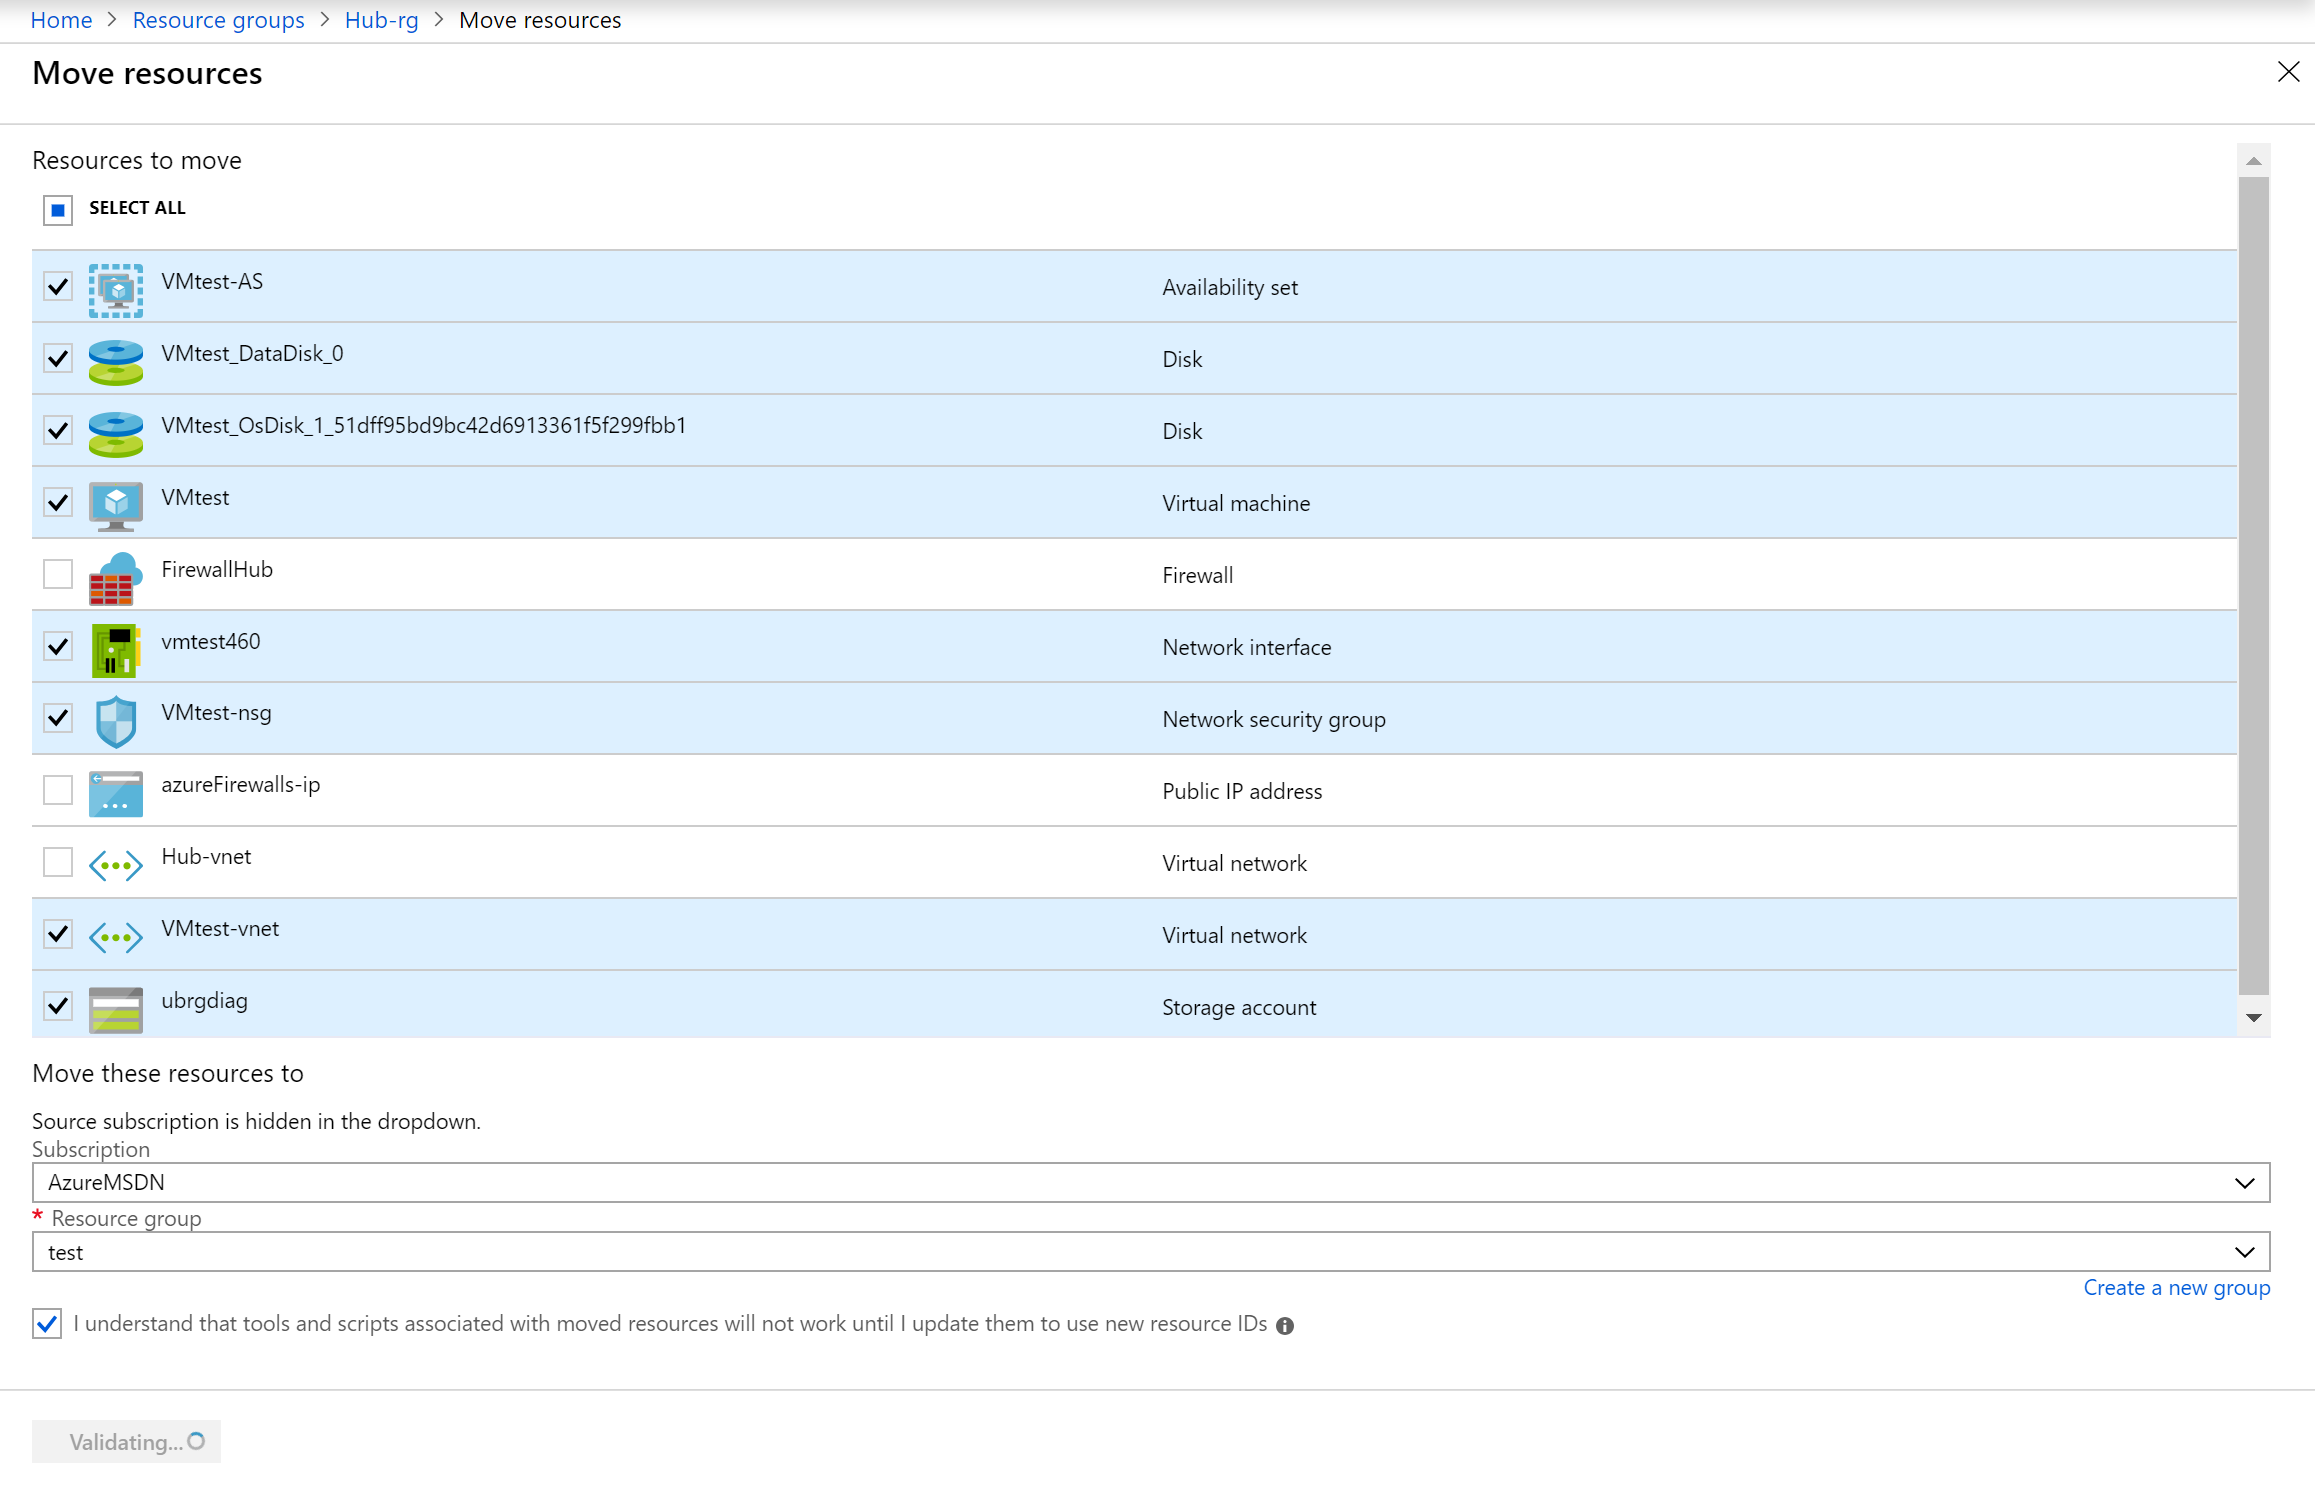
- Click Ok.
Once you click ok, it will validate the resources and move the managed disks to the other subscription. The amount of time will depend how large the managed disk is.